If you’re ready to sell your home but don’t want to work with a real estate agent, it’s time to start thinking about how you’re going to market your property. As a FSBO seller, it’s up to you to create a listing for your home. That means you’re going to need real estate photography that gets buyers to notice your house.
Your listing photos will be the single most important part of your marketing strategy, so you must have good ones. To help you prepare, we’ve created a list of 10 real estate photography tips. Be sure to read them all, especially if you don’t plan on hiring a professional photographer.
According to the 2019 Profile of Home Buyers and Sellers published by the National Association of REALTORS®, 44% of buyers began their home search by looking at online listings of homes for sale. For buyers who used the internet, 87% felt that real estate photography was very useful to their search.
“The key thing to remember is the fact that an overwhelmingly high percentage of buyers start their home search online and are looking for homes that get their attention immediately,” says William Ganz, REALTOR® and owner of Ganz Exclusive Real Estate.
When buyers search for homes online, they often evaluate each home by first looking at its listing photos. Those photos tend to tell buyers everything they need to know. Even desirable, well-priced homes are overlooked by serious buyers when the listing photos posted are dark and of poor quality.
“You only get one chance to make a good impression,” says Michael Shapot, associate real estate broker and head of the Shapot Team at Compass. “And great listing photos are critical to creating that good first impression.”
Although this article provides you with the tips needed for DIY real estate photography, it’s worth stating that professional listing photos are almost always worth the expense.
“Good real estate photography adds so much value to presenting a home as desirable and is the one way to connect with buyers. Spending a little extra money on photos will more than pay for itself in the long run,” says Andrea Thornton, REALTOR® with Agent Inc. in Orange County, California.
To prove her point, Thornton references a survey conducted by IMOTO, a real estate photography company in New Orleans. According to the 248 REALTORS® polled, using professional real estate photography decreases days on market (69.8%) and increases online listing views (88.7%) and showings (88.3%).
Keep in mind that there are a lot of homes on the market, meaning there are a lot of homes for buyers to choose from. If your real estate listing doesn’t feature high-quality photos, potential buyers will move onto the next home without giving yours a second thought.
Thanks to smartphones, almost everyone walks around with a camera in their pocket. However, just because you have the ability to point and shoot doesn’t mean you’re ready to take photographs for your real estate listing.
Properly marketing your home will require high-quality photos. If you don’t want to hire a professional photographer, you must brush up on your skills. To help you best capture your house, we’ve gathered the top real estate photography tips you’ll need to persuade buyers to say yes to your listing.
Before you can start shooting your listing photos, you need to make sure your home is camera-ready. Begin by decluttering and deep cleaning all of your rooms. Every surface must be bare, every shelf neat and organized, so find a place for all of your belongings.
This step of the process is vital for not only photographing your home but also showing it. After asking listing agents about the most common home improvement tasks they recommend to sellers, the National Association of REALTORS® reported that the top recommendations were decluttering (95%), cleaning the entire home (89%), removing pets (83%) and cleaning the carpet (78%).
When buyers look at your listing photos, they will be distracted by anything that appears out of place: stacks of mail on the table, family photos on the fridge, electrical cords on the floor. Even if your rooms appear clean and tidy to you, they still may not be ready for their close-ups.
“Each room needs to be stage set specifically for the camera. The camera sees things differently than the eye,” says Shapot. “There needs to be the right balance, the right pops of color, minimal distractions and the showing off of the most important selling features of a room.”
In preparation for the camera, he explains, “We move and eliminate furniture and props as necessary to maximize the space, for example. Think Architectural Digest – that’s how you want your photos to look. Fresh and crisp but lived-in and home-like. It is a delicate balance to be achieved.”
When selling a home, it’s crucial that potential buyers be able to imagine living there. Yet, it can be challenging for buyers to do so if your house is filled with personal items and screams of your specific tastes. Therefore, you must examine each room objectively to determine whether its current condition appears strong enough to attract buyers.
If you discover that your furniture is bulky, your decor is loud or your style is outdated, you should consider staging your home. According to the same NAR study, 83% of buyer’s agents believe that home staging has made it easier for their clients to visualize themselves in the homes they’ve toured.
Worried about the cost? The NAR reports that the median cost of staging a home is $400. When trying to sell a vacant home, staging is worth every penny, as people have a hard time picturing empty space.
If you think the cost is too steep, you should at least consider hiring someone to stage your home virtually. With virtual staging, buyers are at least be able to get a sense of the space through the photos.
When real estate photography depicts empty rooms, buyers are often unable to determine the approximate size of the space. Sometimes, they may even struggle to identify which rooms they’re looking at. The more buyers have to think about the photos, the less interested they’ll be in seeing your home.
If you want your listing photos to entice buyers, you must take them with a good camera and tripod. Under no circumstances should you try to take real estate photography with your smartphone. While the photos you take on your phone may appear good quality to you, they are nothing compared to the photos taken with DSLR cameras.
DSLR cameras take higher definition photos, which makes the images appear clearer and, the lines within them crisper. Your photos should give potential buyers the experience of standing inside your home, and the only way to do that is by taking them with the kind of resolution that a DSLR camera provides.
Once you get a camera, don’t forget the tripod. No matter how steadily you think you’re holding the camera, it won’t be enough. Even the slightest movement will make your real estate photography come out blurry. By setting your camera on a tripod, you won’t have to stress about keeping your hands still, and your listing photos will come out that much better.
Real estate photographers use a basic wide-angle lens whenever shooting listing photos. It’s the best lens for real estate photography because it gives you a wider field of view.
“A wide-angle lens will show more of a room than a normal lens. Where a normal lens will show half of a living room, a wide-angle lens will shoot the entire room,” says Jeff Kolodny, professional photographer and founder of Jeff Kolodny Photography. “A good photographer will use a wide-angle lens that can show enough of the room without distorting the room too much.”
Since the wide-angle lens enables you to fit more of the room into the frame, it makes your rooms appear bigger. The more spacious your rooms appear, the more interested potential buyers will be in seeing your home.
Even if a new camera lens isn’t in the budget, you can still find ways to maximize the space presented within the frame. Yet, to do so, you’re going to need to take a lot of photographs and play around with a variety of angles.
“Manipulation of space is crucial when shooting a home,” says Lukasz Kukwa, real estate advisor with Coldwell Banker Residential Brokerage in Westfield, New Jersey. “It makes rooms look more spacious than they really are, but the intention is not to deceive potential buyers but to make sure they are able to envision the layout and flow of a property and not have to wonder – or string the photos together – as to what the floor plan looks like.”
There are some ways you can try out to manipulate the space without misleading potential buyers. These tricks will help you make even your most cramped room look spacious:
Don’t shoot straight on: The best real estate listing photos show depth, so buyers can get a sense of the size of the room. Instead of directly facing the wall when taking the photo, position yourself at an angle.
Set your camera up by the door: If you want your room to look as large as possible, set your tripod up in the doorway. This positioning will often allow you to fit the most into the frame. However, depending on the room, you may find that shooting from the corner of the room allows you to get a better shot.
Give yourself plenty of options: Take many photos of each room and make sure that you vary your angle and focus. You’ll be surprised how many photos you need to take before you find one that does your room justice. Keep in mind that you won’t be able to see the quality until you view your shots on the computer, so don’t start deleting any until then.
Lighting is one of the most critical aspects of your listing photos. Dark photographs have a tendency to make rooms look old and dingy. Furthermore, they tend to make it harder for buyers to see the specific features of your home.
To present your home in the best light – both literally and figuratively – open all blinds and curtains to let in natural light. Also, be sure to turn on all light fixtures and table or floor lamps. Interior lighting will not only illuminate dark corners but also add a feeling of warmth and coziness to the images.
Keep in mind that the time of day you choose to take your real estate photography matters. Your photos must appear bright and inviting, which means you need to be ready to shoot when your rooms get the best light. So, what time of day should you get your camera ready?
“The answer to this question depends on the listing itself, the direction that the home faces and the weather,” says Jim Costa, photographer, video producer and owner of Jim Costa Films. “You want the sun behind you when shooting the home because it will be well lit and will look its best.”
Depending on the direction your home faces, Costa recommends the following times:
North: Late morning to early afternoon
East: Morning
South: Early morning or late in the day
West: Afternoon
Try to time your photoshoot when the weather is at its best. The ideal time would be a sunny, spring day because curb appeal is at its highest for exterior shots. Plus, your rooms are bathed in natural sunlight.
Regardless of the time of year, be sure to choose a sunny day. Real estate photography doesn’t come out nearly as well when the weather is bad. Avoid shooting on rainy, snowy and overcast days.
Since real estate photos help increase buyers’ confidence in the property, make sure you post enough of them on your real estate listing. Listings that don’t include many photos are viewed suspiciously by buyers. They tend to question the quality and condition of homes that are not thoroughly photographed.
The ideal number of photos will depend on the size of your home and the number of rooms within it. While small apartments may have as few as four or five photos, large properties could have as many as 25 or 30. To figure out how many is right for your listing, consider what a buyer would want to see.
“You’ll want to tell a story with your listing photos,” says Costa. “You should follow the path a buyer will take when they arrive in person. Start with the front exterior and move through the house as you would when you first enter.”
Make sure to post the pictures in that same order to create the impression of a walkthrough. Uploading the photos out of order will make it harder for buyers to grasp the space.
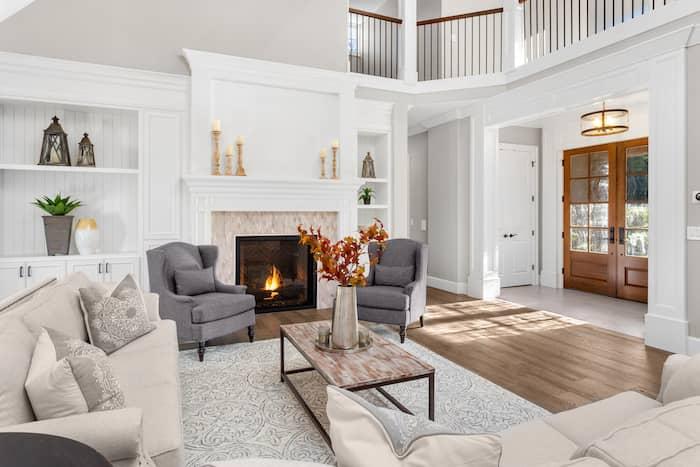
Before you upload, review the photos to ensure you’ve captured all the impressive, unique aspects of your home. Your images should highlight any part of your property you think will be a selling point, be it the stadium seating in your home theater, the wood-burning fireplace in your library, the game room in your finished basement or the exquisite landscaping in your backyard.
Don’t forget that real estate listing photos are supposed to present your home in the best possible light. Of course, you want to include photographs of enough rooms for potential buyers to get a thorough sense of what your home has to offer. However, you also want to ensure that the photos you include work in your favor.
Avoid posting photos of unphotogenic rooms. Rooms that appear disheveled, cramped or in poor condition have no place in your real estate listing. Focus on the photogenic rooms, as those are the ones that will motivate buyers to come to see your home in person. Buyers will be more likely to overlook a defect or two if they’ve already taken the time to visit.
Editing your real estate photography is perhaps the trickiest and yet most important step. You want your photos to look appealing; however, you don’t want to overcorrect to the point where you manipulate them.
“I often tell agents that your photos need to be an accurate representation of the property,” says Costa. “However, there is some editing you can do, including brightness and color correction. You don’t want to misrepresent how light a space is, but you do want to be certain the image is clear enough to see.”
When you take a photo, the camera is rarely able to capture the subject in the same way as the human eye. Usually, space appears darker, colors slightly distorted. Whites, for example, tend to look a bit grayer. That’s why the goal is to retouch your listing photos just enough so that the rooms look just as they do in real life.
“If they look too dark, you should use a program, such as Lightroom or Photoshop to adjust brightness,” says Kolodny. “One tip is to shoot a bit dark and then lighten the images in Photoshop later. If you shoot images that are too light, then fixing them is very difficult.”
When you use editing software, just make sure not to mislead viewers. Don’t try to add more attractive features, remove fixtures or change your windows’ views. Your photos must be accurate representations of your home.
Once you’ve settled on your real estate photos, it’s essential that you create a listing that’s as high-quality as your photographs. In your real estate listing, you should include a description of your home that’s clear, detailed and engaging. Your words, coupled with your photos, should walk potential buyers through each room and tell the story of your home.
Keep in mind that the majority of buyers will swipe through your photos before looking at your description. Meaning, if your photos aren’t well-lit, in-focus and enticingly composed, buyers won’t waste their time with your words. So, be sure to create a home listing strategy that places emphasis on your images.
No matter where you are on the home selling journey, consulting experts can help you sell your home faster. For more advice on each step of the home selling process, check out our Ultimate Guide on How to Sell a House For Sale By Owner. You’ll find invaluable tips on pricing, marketing, showing and negotiating offers on your home.
We know that listing your property is no easy task. It can be both confusing and time-consuming. That’s why we’ve compiled a list of tools, resources and legal forms to help you through it.
Sign up for free tools to help you through the marketing and legal aspects of your sale. If you need more help, you can also pay a one-time fee to work with your own Home Listing Coordinator, who will guide you through the process.